Showing posts with label Homegrown crafts. Show all posts

Jun 5, 2019

Junkjournaling - Ephemera Mania

 Ephemera Mania kicking in..

Once you start making ephemera there is just no stopping..certainly not once you start looking for tutorials on youtube..I really need more hours in my day!! 

 "Busy Bee" paperclip ephemera 

 tug spot envelope  made from craft paper
 This little vellum paper envelope is such a hoot...#badpunswarnig
little dangly charm to dress up my tags or just to add to a page

May 31, 2019

DIY 25th Wedding Anniversary Card

Anniversary/Birthday card DIY Idea
 

Not long ago my parents celebrated their 25th wedding anniversary, amazing! 
It was a great party, everyone was there and my parents and all of us guests had a great time 💕😊


I made them a very personalised anniversary card and wanted to share the link to the tutorial here with you. 


Good luck and have fun crafting :)


May 28, 2019

Junkjournaling - Little Angel Ephemera


Junkjournaling - Little Angel Ephemera


Making ephemera is so satisfying and fun, I love it 💗
This one I made using cutting dies from Aliexpress, a piece of fabric from a shirt we had to rip up for my daughters dance class, a bit of salvaged bookpage and lots of Distress Oxide Ink.

I want to get into Junkjournaling more so I figured starting to make ephemera is a good place to start, all the amazingly talented ladies on youtube say they go throught them superfast when they make their journals 😃


Dec 15, 2014

Gorjuss Stamps Paper piecing Idea

This is my first try at paper piecing with my beloved Gorjuss stamps.
I wanted to make some christmas girls for christmas cards.
Cutting  out the hair is killing me!
If anyone has any tips and tricks involving paper piecing please let me know in the comments! :)


Dec 12, 2014

Polymer Clay Christmas - Merry Christmas 2014


Merry Craftmas Christmas everyone!

I wish you all a very merry christmas, stay crafty and healthy! 
 xoxo 
Steffi


the tutorial for the cupcakes can be found here !


Oct 14, 2011

Cute Amigurumi Family

What better time to start a new hobby then a long and rainy summer. I always wanted to crochet those cute Amigurumis and this summer vacation, in all its raininess, was the perfect time to start doing so.

 Here is my  little Amigurumi family:


Amigurumi worm in his apple home

Amigurumi worm and his apple home

Amigurumi butterfly in his pear home

Amigurumi butterfly

Amigurumi bunny in his carrot home

Amigurumi bunny and his carrot home

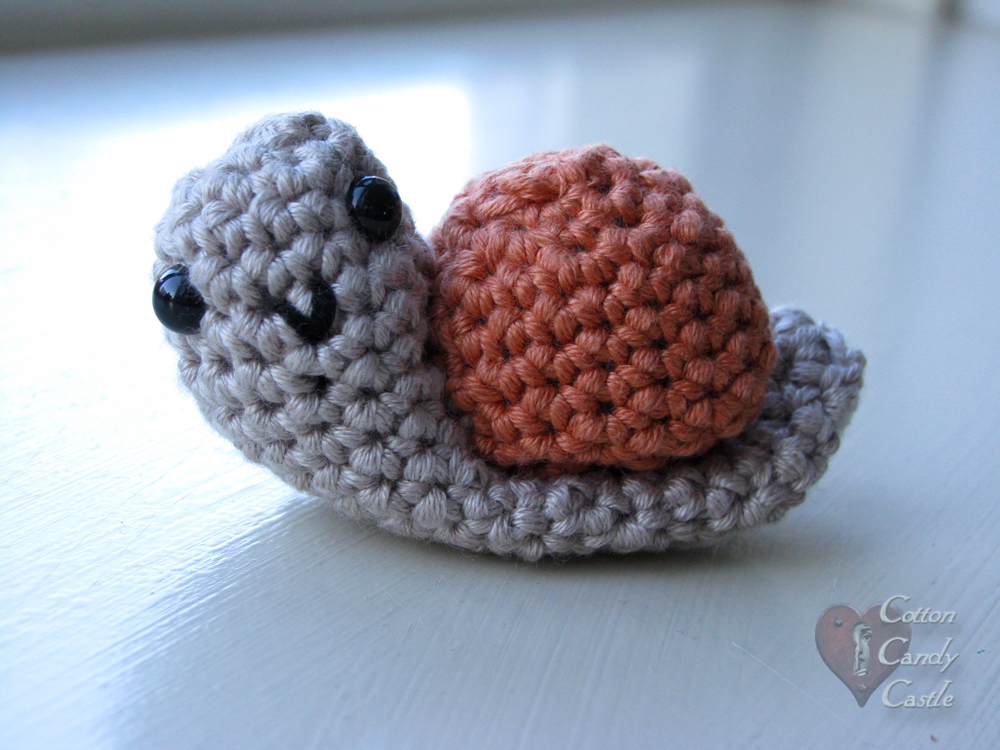
Amigurumi snail in his strawberry home

Amigurumi snail


My daughter saw Wall-E for the first time this summer and was very touched by that movie (can't blame her, so am I every time I watch it :)
When her birthday came around I found that there is ridiculously little merchandise from Wall-E on the market so I made her a little EVE myself.

Amigurumi EVE from the movie Wall-E

Amigurumi EVE from the movie Wall-E

She really liked her :)

There will be a wave of these little dudes crashing over my blog in the future, 
I LOVE making Amigurumis, they are just too cute!


Jun 1, 2011

Homegrown Crafts - Steampunk, Tribal Fusion and a dedication to Otep

Here is some of my recent work.
I was so busy posting tutorials of all sorts that these pictures lay forgotten on my hard disk.


Art Saves


This medallion is dedicated to and inspired by one of my favorite artists Otep.


Captured Time


Wire wrapped clockwork ring.


Tribal Fusion


Polymer clay and vintage jewlery pieces.


Apr 21, 2011

Polymer Clay Cotton Candy Tutorial

How to make  
sweet cotton candy charms 
out of polymer clay.


1. What you need: preferably two colours of polymer clay (I went for glitter white and raspberry from Fimo), a toothpick, something to cut your polymer clay with , an eye pin and, not shown in the picture because I forgot to put it there, a wire cutter (picture 7) and a plier to bend your eyepin with (picture 9).

 Polymer clay cotton candy tutorial 1


2. If you go for a white/other colour combination like I did then cut off about double as much white clay then the other colour.
But really it is up to personal taste what colours the cotton candy is supposed to be.
Condition your clay until it is easy to use. I found that leaving it a bit harder works rather well for this project, it gives the cotton candy a bit more texture.

3+4. Wrap the white clay around the coloured clay so that it is completely encased.


Polymer clay cotton candy tutorial 2


5. In a twisting motion, mix the two colours a bit until you get a nice streaky effect that resembles cotton candy. Its best to only twist in one direction, that way you get the nice spiraly streaks.

6. Form a cotton candy out of the clay. I think it looks a bit like a chewing gum ^^

7+8. Take the eye pin and cut it to almost the length of the cotton candy.


9. Bend the lower end of the eye pin into an L-shape.

10.+11+12. Twist the eye pin into the cotton candy like shown, that way it will never fall out and you don't have to hassle with glue later. Bring the cotton candy into form again in case it gets squeezed a bit.


Polymer clay cotton candy tutorial 4
  
13. Stick the toothpick into the cotton candy. 

14. Baking time. Bake the cotton candy with the wooden toothpick for 25-30 minutes at
110° Celcius/ 230° Fahrenheit.

15. Take the wire cutter and cut the toothpick to your desired length.

16. I found that the toothpick doesn't come out of the cotton candy even with trying my best to pull it out again, so I didn't use glue. In case your toothpick comes out easily I would suggest using a drop of glue to get it to stay in place (jewelry glue shouldn't react with polymer clay so that is recommended.

I didn't use varnish on my cotton candies because I like the textured look it has (the glitter in the clay gives more texture to it too!) 
Feel free to use varnish though, maybe with some glitter, 
there is no such thing as too much glitter! : )

Polymer clay cotton candy, the finished result


Mar 20, 2011

How to make a skirt out of old jeans/reconstruction tutorial

.
How to
  make a  
skirt out of
  old jeans  
tutorial
 

Finally its getting warmer outside again and my
skirt season has started!
As my favorite pair of black jeans were dying a slow death
(certain areas were getting rather see-through from all that riding around on my bike )
I decided to turn them into an A-line skirt and while doing so
make a tutorial about how to accomplish this.
Here goes, have fun.


skirt out of old jeans/reconstruction part 1


 You'll need 
  • a pair of jeans (I guess every pair of pants will do, I'll stick to jeans here)
  • tailoring scissors
  • a seam ripper (I used really thin nail scissors)
  • sewing pins
  • thick yarn (although I used just normal yarn I had lying around  it is recommended to use really sturdy yarn for denim)
  • a meassuring tape
  • an iron
  • a sewing machine.

1. Lay your pair of jeans flat out on a big surface.

2. Fold the legs upwards at about knee hight. 
The upfolded parts of the legs should almost come up to where the zipper ends, you will need the length of  that material to cover the "free triangle part" of the jeans 
(see picture, I have no idea how to explain this better :p )

3. Cut off the legs at the folds.


skirt out of old jeans/reconstruction part 2

  4. With your seam ripper, open up the inner and 
     side seams of the jeans.  

 5. Here is a close up of how to rip the seams. 

 6. Turn the pants inside out.
( in this picture the side seams are not opened up yet,
  its a bit confusing but the next picture lets you see how it should be with all seams opened up!)


skirt out of old jeans/reconstruction part 3


7. Fold the pants so that the sides are on top of each other (pocket on top of pocket kind of).

8. Cut off the material that is not really in line with the rest.
    In the back cut off  to about half way up the back pockets, 
    in the front cut off  a good way below where the zipper ends (ca. 5 cm).
   (Don't cut off too much, refere to picture 10 for a better idea of where to stop cutting.)

9. Fold over the cut edges and iron them so you have neat seams.

10. You should have something like this now.

11. Take the cut off parts of the legs now.
      Cut the legs open along the seams
      (you can rip open the seams too but I found this not to be nescessary).

12. Half way done, two more seams to go!

skirt out of old jeans/reconstruction part 4


13. Now all the seams of the cut off material are open,
      you should have four panels like this now.

14. Take your pants, turn them the right way around and
      lay them down, the back side facing you.
      Take one of the fourn leg panels and 
      place it over the free triangle part.

15. Push the leg panel to the inside and secure with pins
      (don't pin the back to the front by accident, I tend to do that ;)
      Do this with all the open sides of the pants,
      your skirt will start taking shape now 8D
      The crotch area might be a bit tricky, if so then cut a bit higher
      and overlap the material a bit to get an even, flat result. 

16.  Cut an even line around the skirt.
       Some of the panels might be shorter then the free triangle part, 
         this can't be helped really.  You just have to cut off enough  so
       that you have an even line all the way around 
       and no material is standing over anymore.


17. With your sewing machine and a sturdy yarn sew along all the seams.


18. Now you will determin the length of your skirt.   
         Note that this skirt will always be on the short side, 
         there just isn't enough material to work with here to make this a long skirt. 
       For the best result, take a measuring tape, 
       start measuring the front of the skirt,
       measure the length that you want your skirt to be and
       add 2 cm/ca.1 inch for the seam allowance 
       (which will make a neat edge around the skirt.
       If you want your skirt to fray then ignore the seam allowance
       and just leave it like it is now!).
       Use your pins and mark the length+seam allowance all the way 
       around the skirt by folding the seams to the inside 
       at the required length.
       Try on your skirt and check if the front and back are 
       about the same length.
        I needed to add about 2 cm of length in the back, 
         the more curves the more material is needed in the back ;)
       Adjust accordingly
       (leave the skirt a bit longer in the back than in the front
       if needed).
       Now sew along the bottom seam. 
      

       You are done and should have a nice
       A-line demin skirt now!

Jan 17, 2011

iPod Pod

Recently I bought my first iPod (welcome to the new world Steffi!).
I'm a huuuge Audio book fan, I listen to them

whenever I don't have to listen to anything else

(mostly family members)

and my old mp3 player had the habbit of shuffeling the tracks,

which is really annoying when you are trying to listen to a storyline.

So a new solution had to be found, which I did, in form of my lovely
iPod Touch.


The thing is great, really amazing!..with only one drawback.
It's superthin, slippery and far too expensive to be dropped on the floor.

I had to think of something to keep it safe, no matter if I'm on my bike
(I live in Holland, we rarely get off the bikes here),
doing household chores, being out shopping or whatever else.

What I needed was a pod, an iPod Pod!


Finally I can carry my new toy around with me at all times
(checking my surrounding for an open internet connection
has become my new hobby)
without having to worry that it falls out of my pocket.


The next project will be a iPodPod for when I'm in bed,
so that I don't roll over it or drop if to the floor when I fall asleep.

Stay tuned!


Love,

Steffi

Sep 22, 2010

Polymer Clay Cupcake Tutorial


How to make cute cupcakes out of polymer clay
,
ready to hang on your bracelet, necklace, keychain
or wherever you need a cupcake to go.


Polymer clay cupcakes, the finished result
.
.
.


polymer clay cupcake tutorial - step 1 to 4

1. and 2. :
This is what you will need to craft your cupcakes.
I use Fimo clay but any polym
er clay will do.
The colours I used here are brown (Fimo colour:
No.7, Caramel) mixed with a tiny bit of black (No.9, Black), white (No.0, White) mixed
with some effect colour (No.52, Glitter White) and red (No.26, Cherry Red).
You'll need a cutter of some sort, an eye pin, a wire cutter in case you need to shorten your eye pin, some clear (Fimo) varnish and baby wipes.
I strongly recommend that you use varnish that is especially made for polymer clays as the clay can react with
certain types of varnish. You will constantly need the baby wipes because it's really important to clean your hands every time you change the clay colour you work with, especially if you go from a dark to a lighter colour.
Otherwise you'll have the darker clay mixed in with the light clay,
no
good at all!
Enough of it already, let's start crafting!


3.: Condition your clay. Work it with your hands until it's soft and workable.

4.: Roll your clay out into the form of a sausage, then cut off equal amounts of clay. These will be the base for your cupcake.


polymer clay cupcake tutorial - step 5 to 10
5.and 6.: Shape one of the cupcake bases first into a ball, then flatten the ball and roll it
on one side with your finger so you get a cupcake base form (see picture 6.)
Clean your hands with your baby wipes thoroughly.

7.: Make a thin sausage with your white clay and a slightly thinner sausage with your red clay.

8., 9. and 10.: Wrap the red sausage around the white one (8.), twist the two colours slightly so you get a tighter design (9.), then roll the newly formed striped sausage gently with your hand
so you get a smooth and even blend of the red with the white (10.).

polymer clay cupcake tutorial - step 11 to 14
11.: Make a small ball out of white clay and place it on your cupcake base.
This
is your cupcake filling.

12.: Now wrap the striped snake around your cupcake filling in a way that
real cream would do (see picture 13.)

14.: At this point I noticed that my cupcake bases were way too long, they resembled flowerpots more then pastry, so I just cut the base a bit shorter.
Almost all mistakes can be fixed somehow :)

polymer clay cupcake tutorial - step 15 to 18

15.: With your eye pin (or cutter) make some vertical markings along the cupcake base.
You have to hold the cupcake real gently, by now the clay will probably be pretty warm and soft and you run the risk that you'll squeeze the whole thing too much by accident.
If you want to make sure you get a good result you can place the clay in the fridge for a while, the clay will be a bit more forgiving then and not give way so easily.

16.:
Cut the eye pin to a length that will allow it to go a good way into the cupcake, not all the way through though.

17.: Gently push the eye pin into the middle of your cupcake.

18.: Optional: If you want to place any decoration on your cupcake
that is made from clay too (and that can go into the oven), now is the time.
You can make sprinkles (out of thin coloured clay sausages that you cut into sprink
le length), hearts, pearls, whatever you can think up, really!


polymer clay cupcake tutorial - step 19 to 23


19.: Time to bake your cupcake! A word of advice here: it's officially recommended to clean the oven thoroughly after baking polymer clay in it or even better, get a little toaster oven only used for your polymer clay. It is plastic that you are melting here
after all , so best to open a window too while you bake your clay.
I bake my clay on a sheet of baking paper in our gas oven, on gas mark 1.
Make sure your temperature is not too high, especially if you bake white or
transparent clay, otherwise it will turn a bit pink.

20.: When the cupcake has cooled off you can glaze it over
with your varnish. If you like the matte look of it just keep it like it is.

21.: Optional: If you would like to add some glitter to the cupcake,
do it now while the varnish is still wet!
I personally adore glitter so glitter it is! :)

22. and 23.: Get some jewelry glue and drop a little drop of glue on the spot where the eye pin goes into the cupcake. Jewelry glue will dry clear and not react with the Fimo but it is nescessary to fix the eye pin in some way to the clay, otherwise your cupcake will fall off pretty quickly. If you're planning on working a bit more with polymer clay
I can recommend getting some translucent liquid Fimo, it willl come in handy
all the time and it can be used to fix the eye pin to the cupcake too.

You should be done now and have an awsome homemade
cupcake in front of you!
Let it dry and wear it with pride, you made it yourself
!

Sep 15, 2010

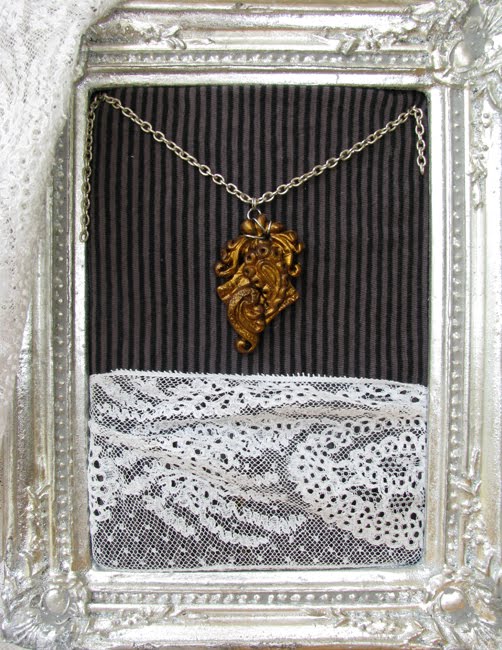
Vintage Style Polymer Clay Pendant

A reminder of times long gone...

Polymer clay pendant - vintage style
I made this from polymer clay (Fimo in this case) and Fimo Bronze powder.

Sep 13, 2010

Rib cage/Spine T-shirt Reconstruction Tutorial

I noticed that the link to the tutorial of my rib cage T-shirt (which I descided now is a spine T-shirt :p )
is no longer active so I made my own tutorial now.

Here goes, have fun!


1.You'll need a T-shirt (I HIGHLY recommend a 100% or at least almost 100% cotton T-shirt with as little Lycra as possible in it),
scissors (do yourself a favour and get some tailoring scissors if you are into crafting, they will make your crafting life so much more easy, I personally did this FAR too late), a ruler and a pencil for light material/(tailor)chalk for dark material.

2. We'll only work and cut on the backside of the T-shirt. To find the middle just fold it down the middle and iron along the fold, that way you'll have your middle marked.

3.OPTIONAL: I always like my T-shirts without the seams (the collar and the bottom seamline), so if you like just cut them off. Don't thrown away the leftover border, there are a million things you can do with it! (like wrap it around your arm, instant win! :)


4. For easier drawing on and to make sure you don't cut through the front of the T-shirt push a piece of cardboard between the layers.

5. With the ruler, first draw the horizontal lines over the ironed middle line. Mine here were 16 cm/6.3 inch in width and had 5 cm/2 inch between them.
Then draw lines between the center lines, not all the way to the center and the outside of the T-shirt though (see picture 6).

7. Time to make the first cut! For easier cutting you can lift the T-shirt up a bit. Cut along your lines.

8. You should have someting like this now.

9. Now for the tricky bit. We'll weave the straps under-and-over now, starting at the top.
Ignore the very top strap, the neckline so to say. Skip the next strap too and grap the third strap.
Push the strap under the second strap that you just skipped, then bring it up and weave it over. You're still holding on to your innitial strap. Now grap the fourth strap through the strap in your hand, hold on to the new strap,weave the fifth strap through the one in your hand and so forth, you should have something like picture 10 now.
I know, it sounds ridiculous, but you'll totally get the idea once you see it all in front of you, try around a bit and you'll get there!


10. see above describtion.

11. Braid all the way down the T-shirt.

12. When you have reached the end, either cut the last strap through and tie the ends to the side straps, or sew the last braided bit to the very last middle strap. I sew my ends together here.
You should be done now :)

The last picture shows the difference if you make more lines/straps, you get thinner 'rips'then.
Also, the grey T-shirt is 100% cotton, whereas the pink one is a viscose/polyester/lycra mix.
The normal 100% cotton T-shirts work SO much better for these kind of reconstructions, the straps curl themselfs up when you stretch them and look a lot better then if they have Lycra in them, then they will always spring back into place.
So try to work with a 100% cotton T-shirt.